Tuesday, October 23, 2012

Electrify Your Jack-o-Lanterns

Tired of buying ton of candles to put in your Halloween Jack-o-lanterns or don't put them out very long to avoid using a lot of candles?  Try electrifying your Jack-o-lanterns by putting a night light in them.

All you need is an extension cord and a small night light with a cover so that it is not so bright.  It it is an uncovered bulb, it may take away from the effect of the Jack-o-lantern. 

1.  When you are finished carving the Jack-o-lantern, cut a square hole about 2" by 2" in the back of the pumpkin so that you can slip the extension cord and night light into it.  You can make it smaller if you want, but you'll have to put the extension cord in the Jack-o-lantern first, the plug the light into it.

Electrify your Jack-o-lantern: Step 1 - cut a hole in the back of the Jack-o-lantern

2. Slip the extension cord and light (or just the cord if you opted for a small hole) into the Jack-o-lantern.

Electrify your Jack-o-lantern: Step 2 -slip a nightlight and extension cord into the jack-o-lantern
Electrify your Jack-o-lantern: Step 2 - positioning the hole low will help hide the extension cord

3. Position the night light so that the cover is facing the front of the Jack-o-lantern where the face is.  This will prevent the light from being too bright.

Electrify your Jack-o-lantern: Step 3 - position the night light so that the cover faces the front or face of the jack-o-lantern

4. Cover the Jack-o-lantern and plug it in!  If you want, you can put your pumpkins on a timer system with other Halloween decorations.

Electrify your Jack-o-lantern: Step 4 -Cover the jack-o-lantern and plug it in.  Walla!

Electrifying your jack-o-lanterns can make your Halloween Holiday much more enjoyable and make your yard and garden much more festive!


Electrified Jack-o-lanterns

Friday, August 31, 2012

Quick Meal - Southwestern Spaghetti or Rotini or Zita or a Pasta of Your Choice

One of my favorite meals that I used to have as a kid was a concoction of two different favorites.  When my Mom would have spaghetti dinner one night and have chili a couple of nights later, she would often take the leftovers from both if there were a lot and mix them together, heat them up and serve.  She didn't really have a name for this Italy meets Southwestern meal, but it was Delicious!

Mix canned chili in with your favorite pasta to make a delicious Southwestern style pasta dish.  Pictured here is Southwestern Ziti.
Mix canned chili in with your favorite pasta to make a delicious Southwestern style pasta dish.  Pictured here is Southwestern Ziti.

As an adult I have often made a variant of this delicious concoction, only much simpler.  When I am in a pinch for time or just do not feel like spending lots of time cooking, I have cooked pasta, most often spaghetti, and then taken 1 or two cans of Hormel Chili and mixed it into the pasta for a quick and tasty meal.  A spiced up variant of spaghetti that I have dubbed Mexican or Southwestern Spaghetti and it can't get much simpler to make.  I have also used various pastas such as rotini or ziti each of which gives a different twist and flavor to the meal.  So if you are in a pinch for time or just want to spice up your pasta, give it a try!

Sunday, August 5, 2012

Plants Gone Wild: Part 5 - Sitting Garden On the Mend

More progress on my sitting garden this weekend.  Like to spend hours working on it not minutes so that is pretty much when any work gets done!


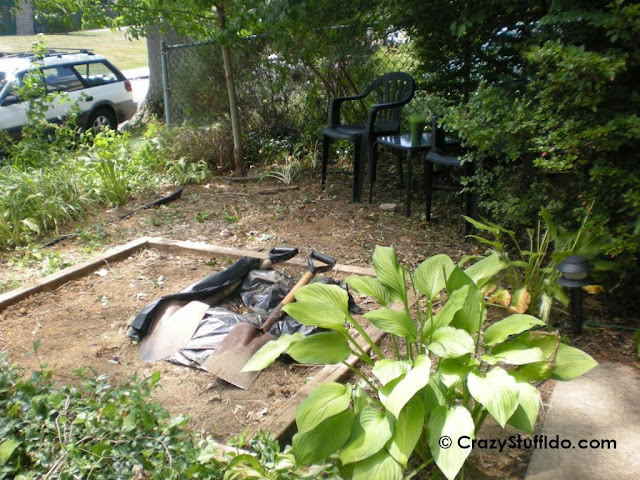
Plants gone wild:  Not so much any more. With still a lot of work to go, my overgrown front garden is turning into a nice sitting garden.
Plants gone wild:  Not so much any more. With still a lot of work to go, my overgrown front garden is turning into a nice sitting garden.


What I learned today:
1) Ivy has a mind of it's own.  It will grow one direction and as soon as it spots a wall to climb, it will turn 90 degrees and grow that direction.  I swear!
2) When having a drink tucked under your arm and holding a tool in the other, don't bend over to set the tool down.
3) Pulling on an ivy vine is kind of like "How many licks does it take to get to the center of a tootsie roll tootsie pop".  You keep pulling and pulling and pulling, then you just wanna break the damn thing off!


Plants gone wild:  A view from my sitting garden chilling out under a tree during a break on a hot humid day.
Plants gone wild:  A view from my sitting garden chilling out under a tree during a break on a hot humid day.

Sunday, July 15, 2012

Don't Know What Things to Make with Zucchini? Try Zucchini Pie

Don't know what to do with your zucchini other than chop it up for salad?  Here is a great recipe for a quiche type dish known as zucchini pie.

Don't know what to make with your zucchini?  Try zucchini pie.
Don't know what to make with your zucchini?  Try zucchini pie.


ZUCCHINI PIE

Aka “Mystery Dish” because some folks get turned off by the name.  However it tastes nothing like it sounds.  This was passed down to me by a friend of mine. I alter it however by using different cheeses and optionally adding bacon or ham.  However, any version tastes great.

Prep time: about 20 to 30 min
Cooking time: 40 to 50 min

Ingredients:

3 cups grated zucchini
1 small onion chopped (use a large one to make it a little more zesty)
1 cup all purpose flower
1 cup grated provolone cheese ( I use a combination of mozzarella and provolone, Sargento Classic)

Optionally: 4 to 6 slices of bacon chopped depending on thickness( I typically use 98% fat free turkey bacon to keep it relatively healthy)   OR  about ½ cup of diced ham cooked

3 beaten eggs (I typically use ¾ cups Egg Beaters to cut down on cholesterol)
¼ cup vegetable oil (I use olive oil)
4 tablespoons grated parmesan cheese  (a few more tablespoons will be required for topping) (I use packaged Sargento Artesian parmesan)
2 teaspoons chopped basil
1 teaspoon baking powder
1 teaspoon salt
½ teaspoon fresh ground black pepper (Use a bit more to beef up the zesty flavor)

  1. If you choose to add bacon or ham, prepare the meat by grilling it while grating and chopping the other ingredients
  2. Pre-heat oven to 350 degrees
  3. Combine all ingredients in large bowl
  4. Use 10” round glass pie plate (foil plates work too if you want to take it somewhere)
  5. Coat pie plate with vegetable oil (I use lite olive oil cooking spray)
  6. Bake 45 to 50 minutes (depends on oven, I bake for 40)
  7. Remove from oven, immediately sprinkle grated parmesan over top of pie
  8. Optionally, place pie back in oven to melt the cheese topping a bit
  9. Allow to cool, 20 minutes before serving (Must be in a open area.  Placing inside a microwave or small enclosed space will cause the center of the pie not to solidify)


Also tastes great cold the next day as a snack however, warming it give the best flavor.  Can be a great breakfast or side dish.

Monday, July 9, 2012

How to Spruce Up That Old Dingy Plastic Lawn Furniture and Spend Little Money

Have some old plastic lawn or patio furniture that is looking dingy and stained?  Don't throw it away.  In these days of pinching pennies, you don't have to buy new furniture and you don't have to use it the way it is.  Simply give it a new paint job!  All you have to invest is a couple of cans of multipurpose spray paint and a little of your time.


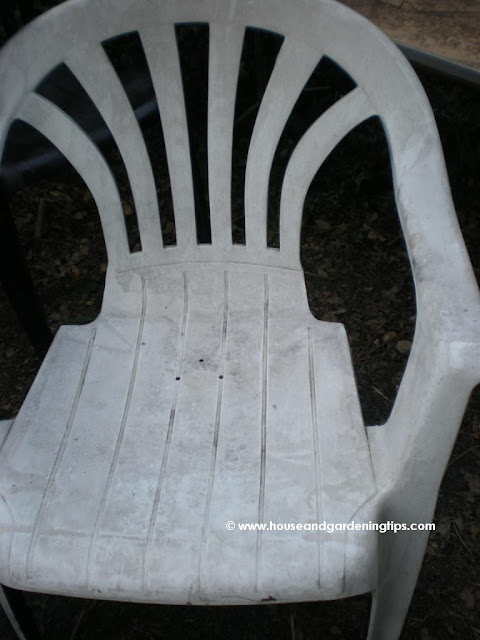
Dingy looking lawn or patio furniture can be easily reclaimed with a coat of paint. Note the 3 holes drilled in the bottom of the chair.  This allows the rain water to drain from the chair so you don't get a soggy butt after a rain storm.
Dingy looking lawn or patio furniture can be easily reclaimed with a coat of paint.  Note the 3 holes drilled in the bottom of the chair.  This allows the rain water to drain from the chair so you don't get a soggy butt after a rain storm.


Before you begin, wash the piece of furniture thoroughly to remove all of the dirt and grime possible.  If you have access to a power sprayer, that would be the ideal way to clean them.  That may even do the trick if the furniture is not stained too badly.  However, if the stains cannot be removed, give it a coat of spray paint.  One benefit of doing this is... you can change the color of the furniture if you want!


Keep Water from Accumulating in the Seat of Chairs

While you are prepping the piece of furniture, if it is a chair or something that tends to gather water in the seat when it rains, take the time to drill a few holes in the bottom of the chair before you paint it.  If you are not sure where to drill, set the chair on a flat surface and dump a cup of water in it. Mark the area where the water lays with a hammer and nail.  Remove the water, dry it, then drill the holes.  You won't have a soggy butt again!

Prep is Everything

If you do not intend on using a primer or are not using a painter/primer combo, you may want to take some fine grit sand paper and lightly scuff the surface to 1) remove any scratches or nicks that may stand out in the new paint job and 2) rough up the plastic surface just enough to make the paint stick better.  After sanding, give the piece of furniture a quick rinse with the hose and allow to dry.

Paint Away!

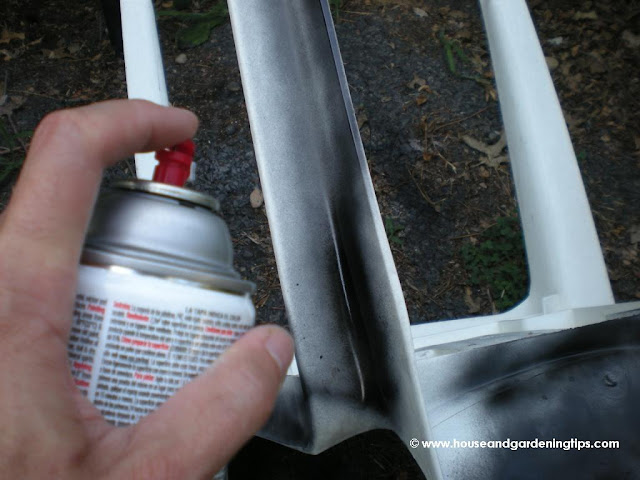
Finally, choose your favorite color of multipurpose spray paint at your local hardware or home supply store.  If you are doing a small chair, it may take 1 can.  If you are doing a lounge chair or something larger, it will most likely require more.  Check the paint coverage on the can before you purchase it and calculate how much you need.

When repainting your plastic patio furniture, make sure to select a paint that will adhere to plastic.

Once you have your paint, make sure you use a well ventilated area and place papers or drop cloth under the furniture and make sure you are not near any object that may catch the over spray from the can, especially if you are doing this outside.


When repainting your plastic lawn furniture, don't forget to turn the chair upside down and get the underside as well as all the nooks and crannies in the legs of the furniture.

One coat may do the trick, or if you are not satisfied with the finish, apply another.  However, the more coats you apply, the more paint you are going to have to purchase.  If you don't watch, you may spend as much as you would have if you bought new furniture!


A reclaimed plastic patio chair that was old and dingy.  My son came home and thought it was a new chair.
A reclaimed plastic patio chair that was old and dingy.  My son came home and thought it was a new chair.

Once the paint dries, wallah! No more dingy looking plastic patio furniture.  If the paint begins to chip or peel in a year or two, simply sand and repaint!